Restaurant Listings 101: Claiming Your Listings After You Acquire a Location
You’ve signed the lease and started planning your grand opening event. But there’s one piece of the puzzle that’s easy to overlook when you take over an existing restaurant location: restaurant listings management.
If the previous owner didn’t keep things tidy online, you may be inheriting outdated information, locked accounts, or even duplicate profiles floating around the internet. And that matters… a lot. Customers rely on accurate listings to decide where to eat, and if they find the wrong hours, a disconnected phone number, or last year’s menu, they’re much less likely to give your new location a chance.
In this post, we’ll cover best practices for restaurant listings management when acquiring a location, including a detailed walkthrough on how to claim an existing Google Business listing.
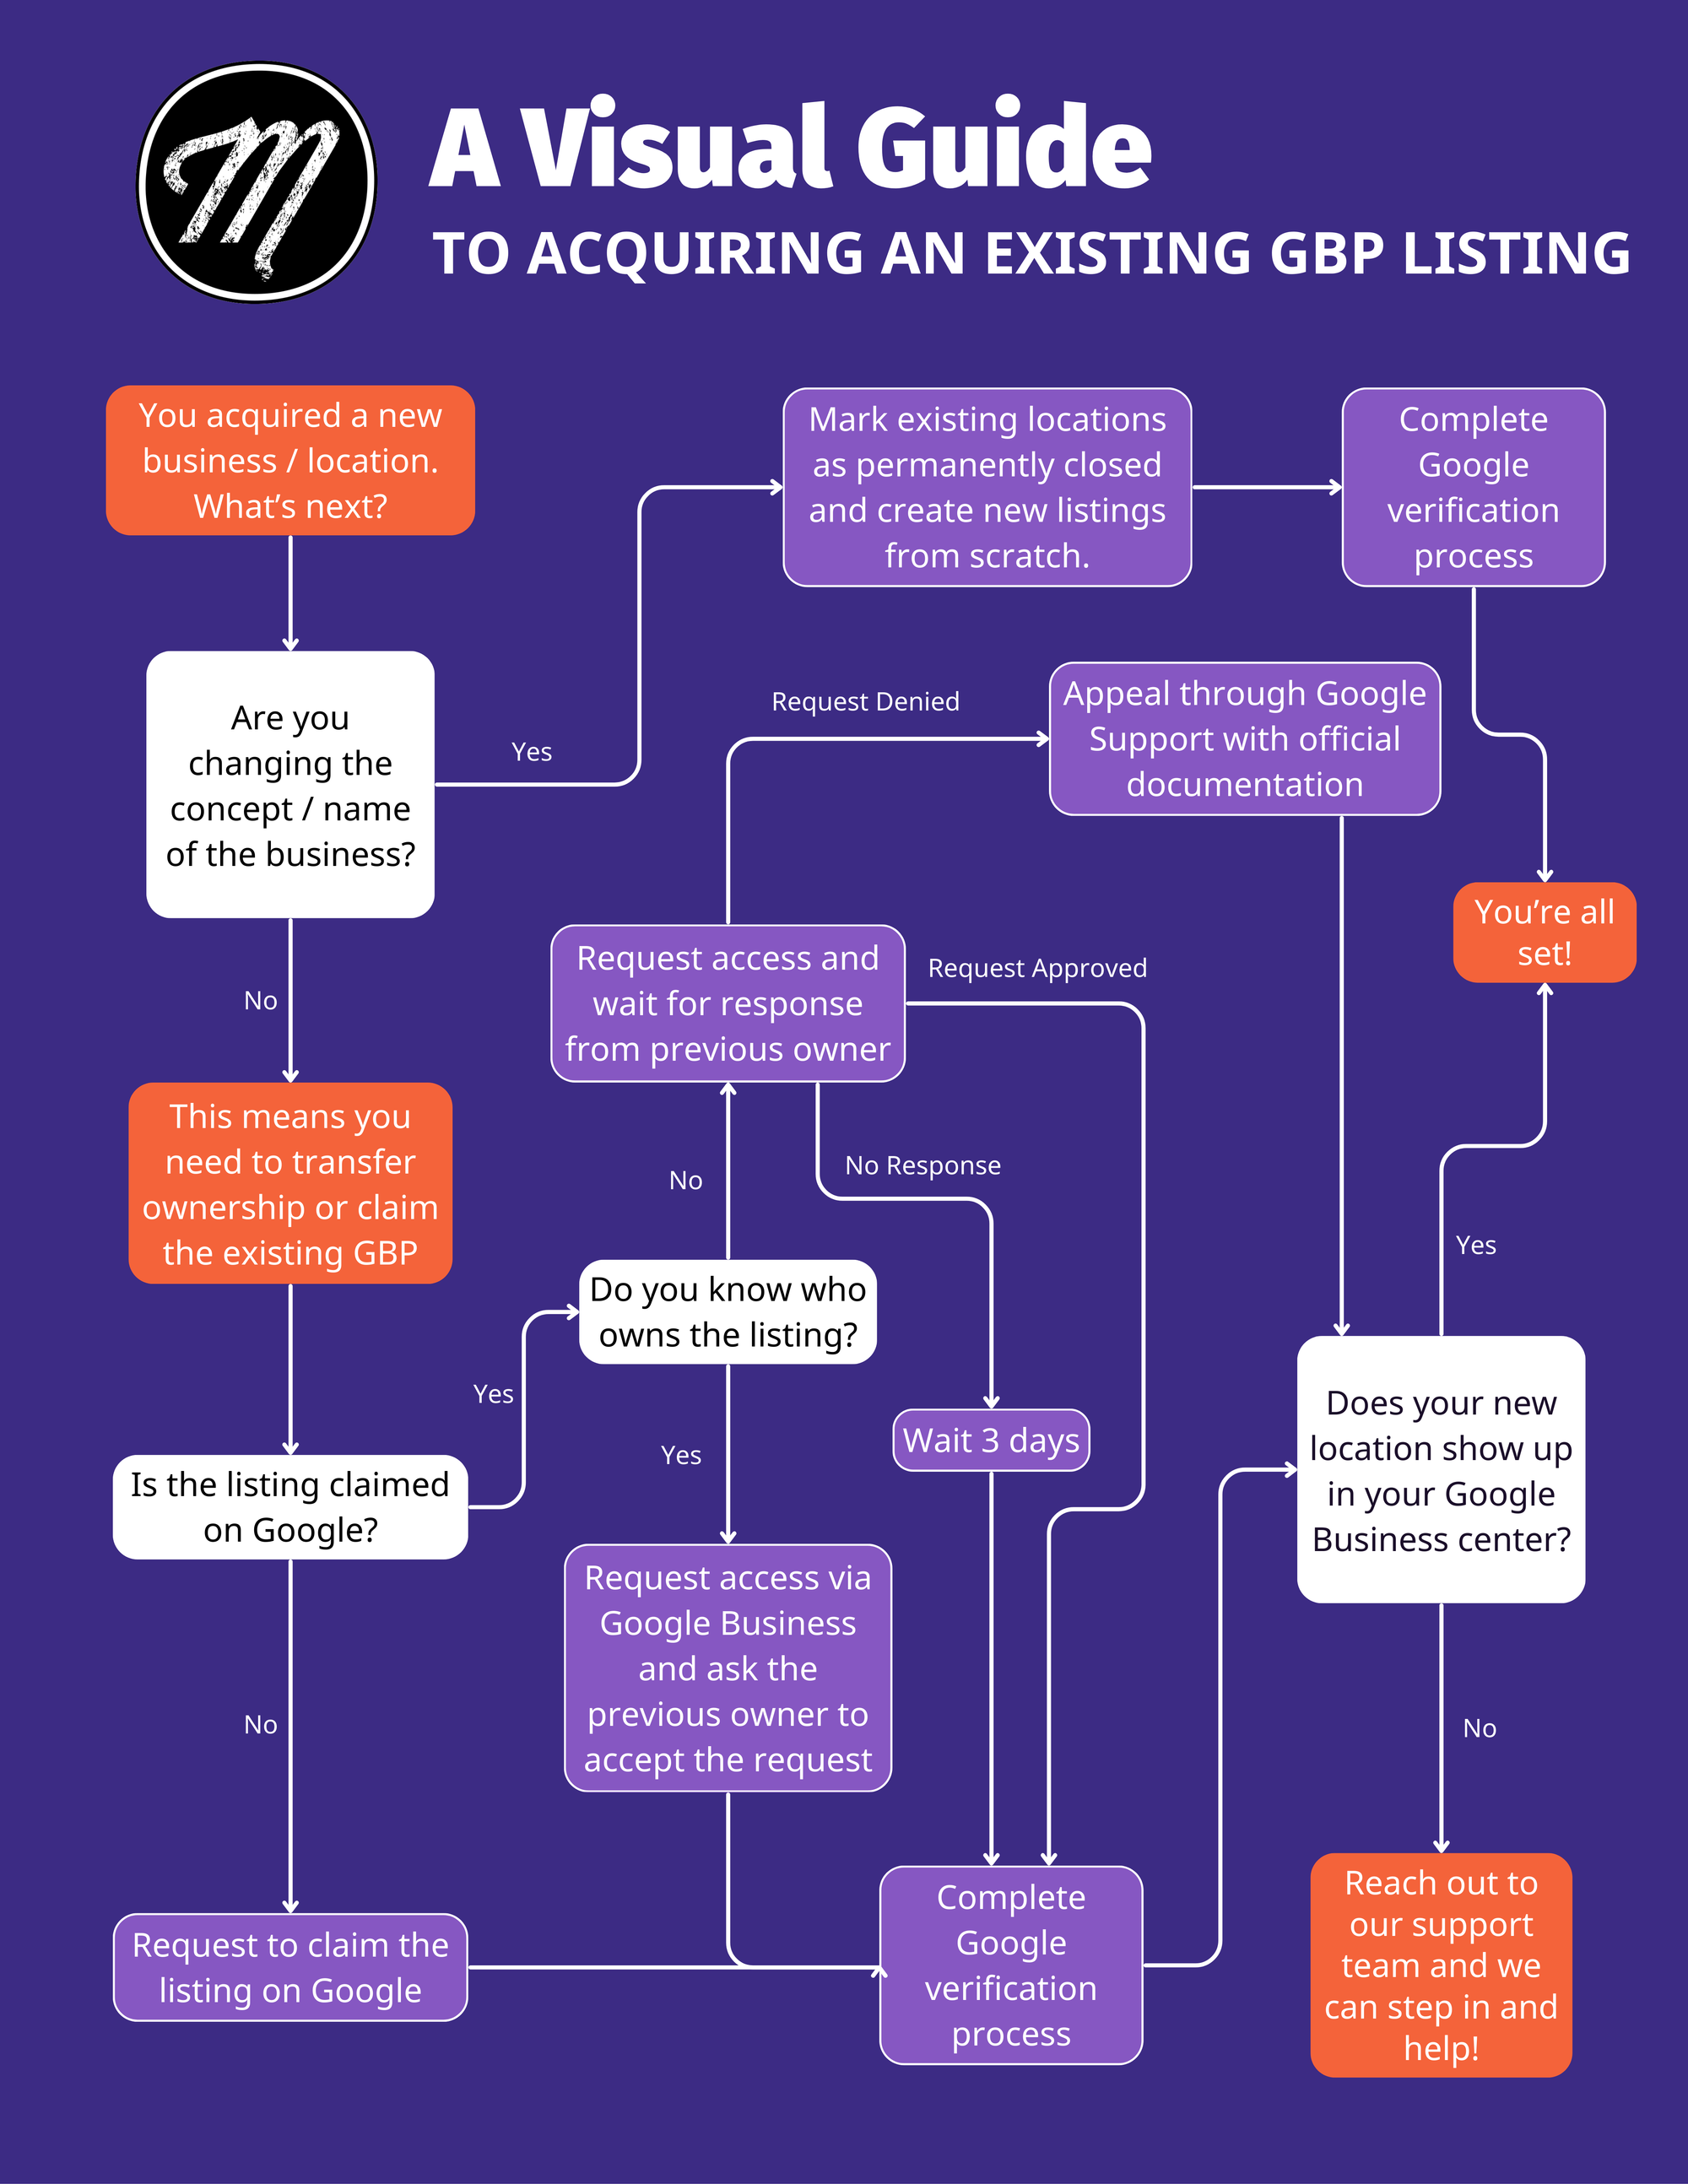
Step 1: How to Claim a Google Business Listing
Google is the most-searched platform for restaurants, so it should be the first listing you clean up. The process depends on who currently owns the Google Business Profile (GBP).
To get started, log in to business.google.com and search for your business by name.
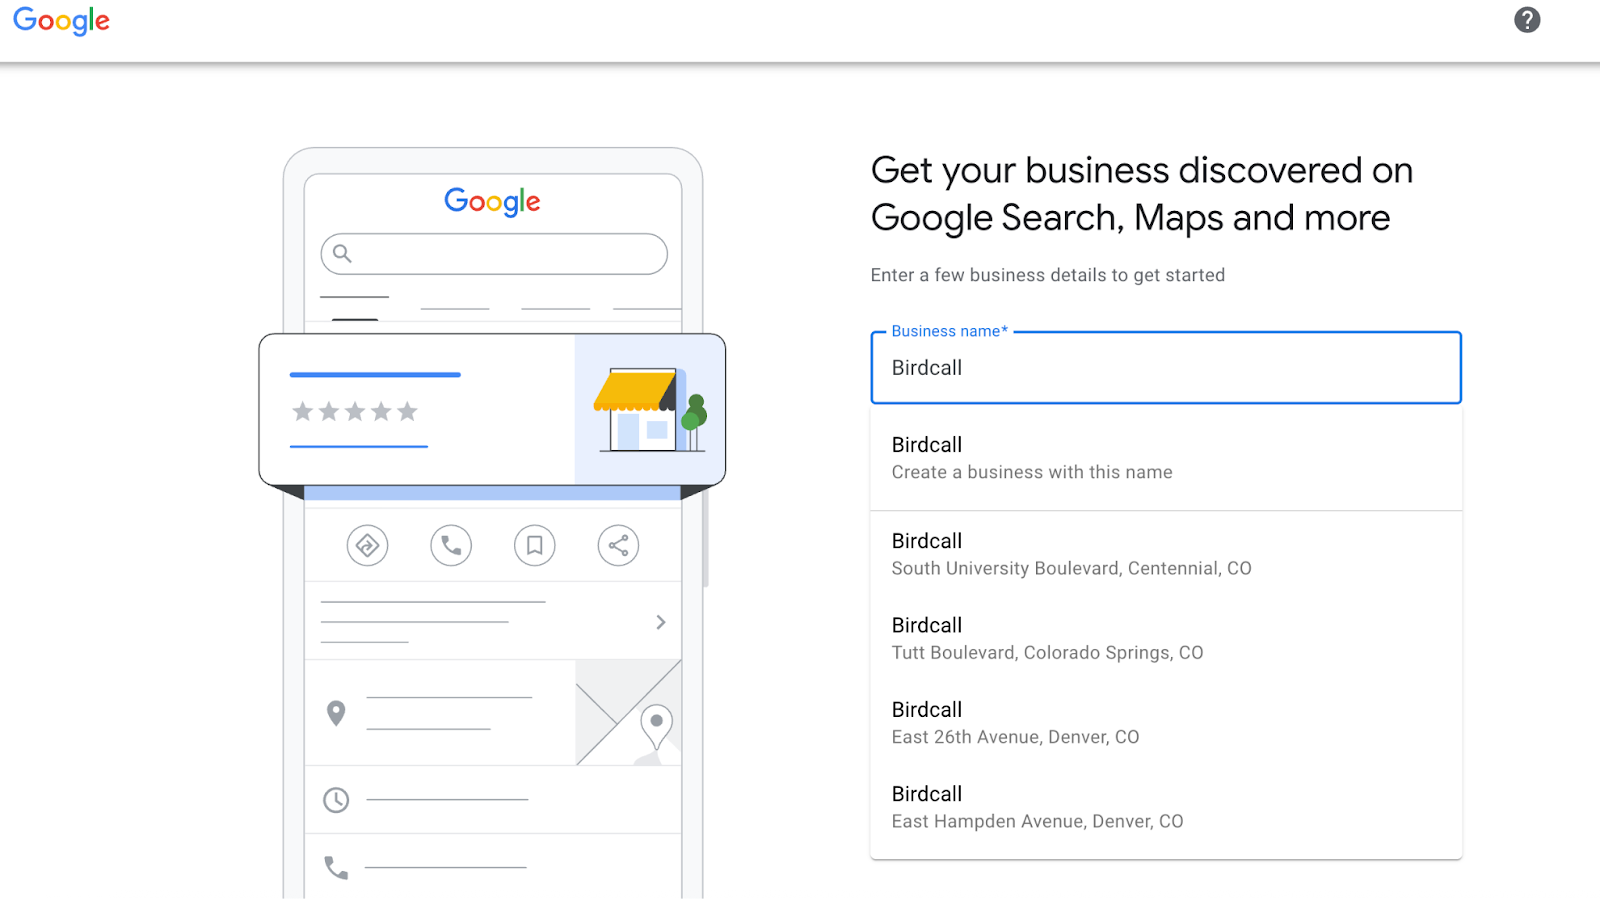
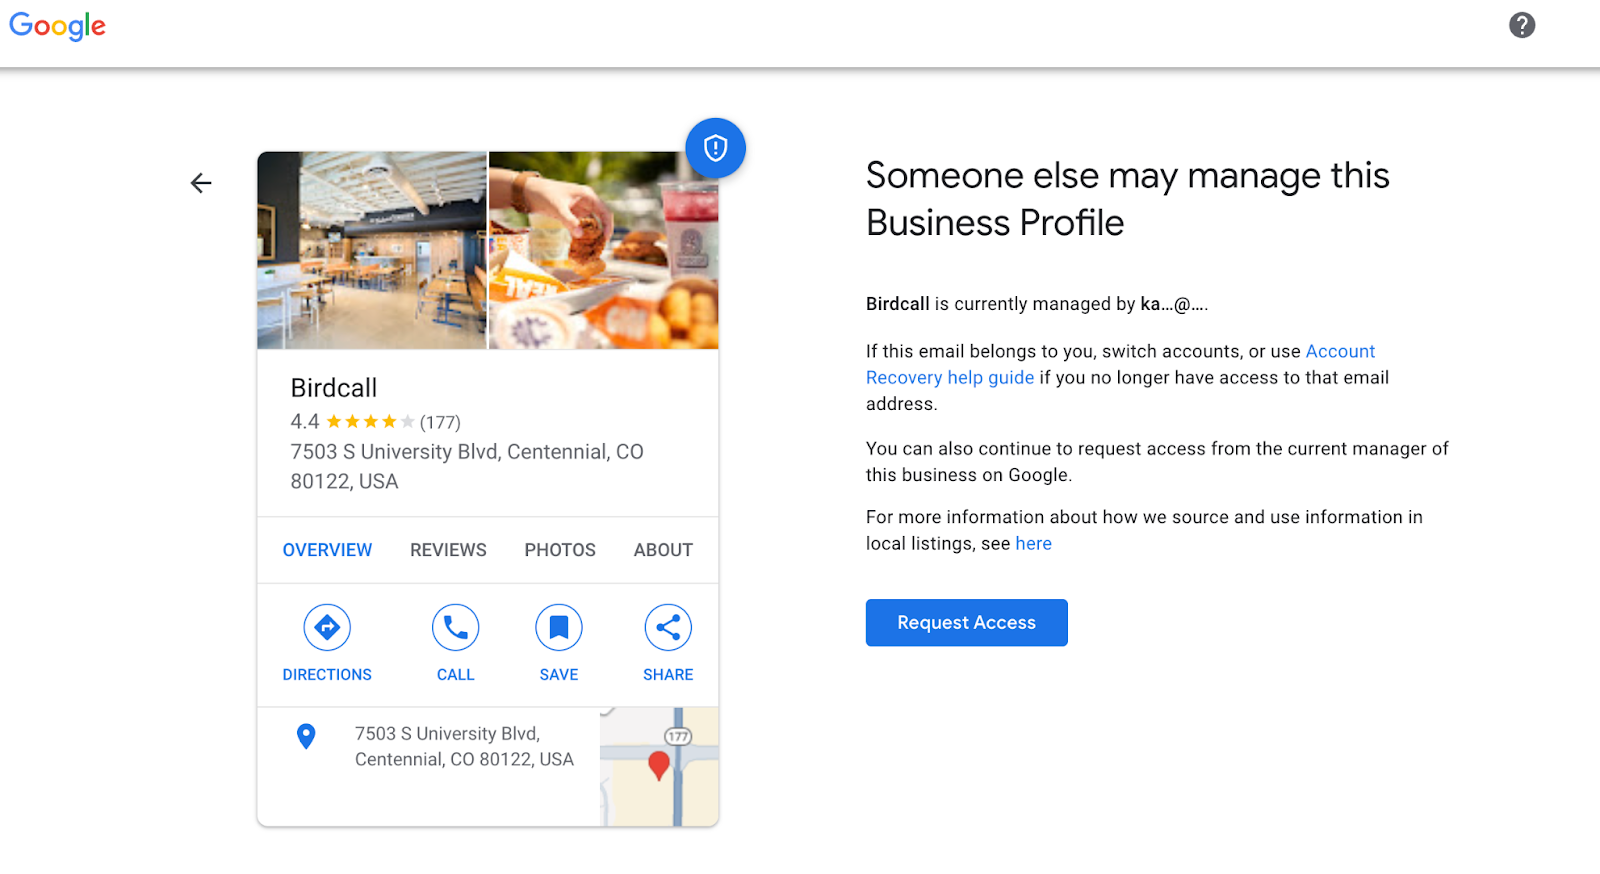
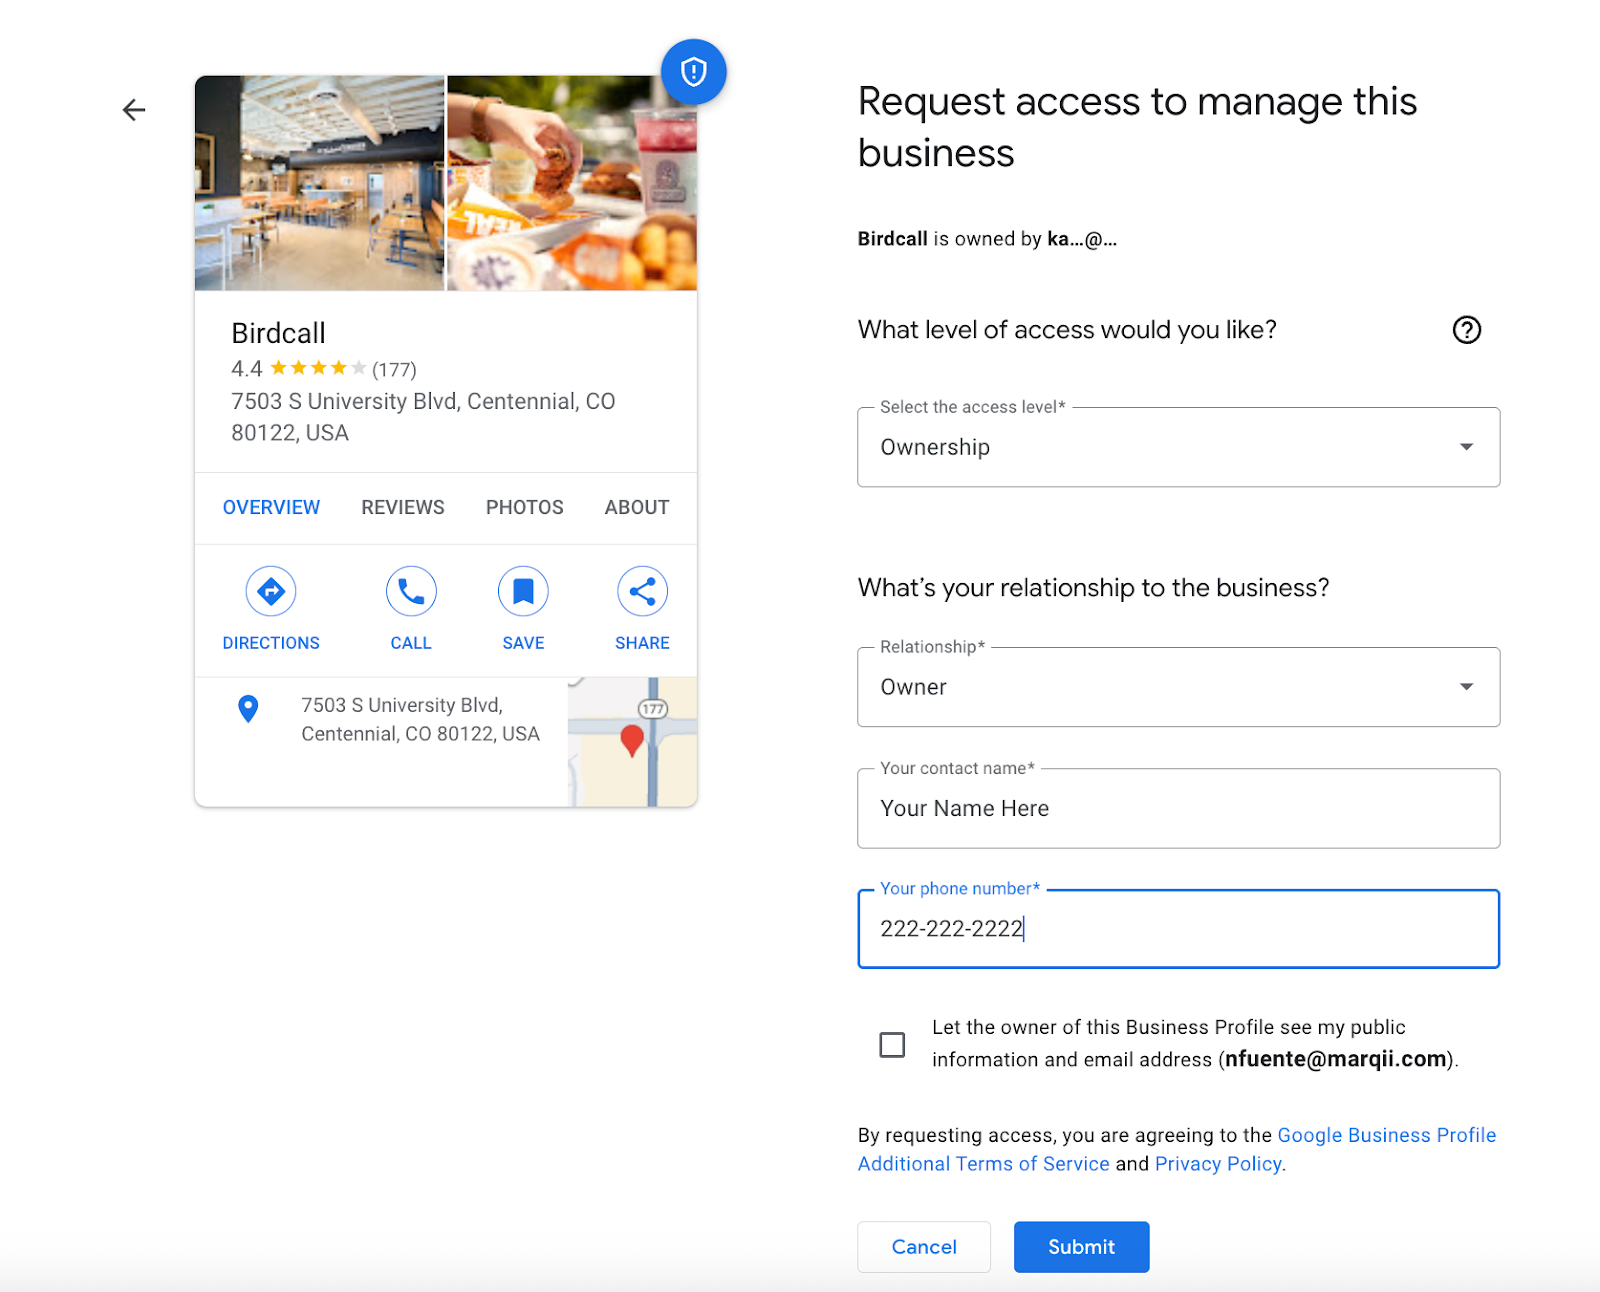
Once you find the business that matches your address, select it to request access.
To request access, you will need to select “Ownership” under access level and fill in some information.
Once you fill out and submit the request, the process will vary based on who the previous owner is.
If you know the current owner
- Ask them to transfer primary ownership to you through Google.
- Alternatively, you can request ownership yourself, and the current owner will receive an email to approve.
If you don’t know who owns the profile
- Log into your Google Business Profile account and request access. From there, one of three things can happen:
- Approval: The current owner grants access — you’re in.
- Denial: If they reject your request, you can appeal through Google Support with official documentation (like a business license or utility bill showing the exact name and address).
- No response: If the current owner doesn’t reply in 3 days, Google lets you verify ownership yourself (via video call, postcard, phone, or email).
If nobody owns the listing
- Request access and follow the normal Google verification process to claim it.
Before you start the verification process, make sure your website is accurate and matches the info on your listing. Google cross-references your site to confirm your location.
Once you’ve secured ownership and verified the listing, you’ll have full control to update the business info, menus, photos, and more. Knowing how to claim a Google Business listing is the foundation of restaurant listings management success.
If all of this feels confusing, we created a visual guide to help you below:
Step 2: Check Other Key Platforms
Google may be the biggest player, but it’s not the only one. Don’t forget to update:
- Apple Business Connect (critical for iPhone users and Apple Maps searches)
- Yelp
- Facebook/Instagram
- TripAdvisor
- Reservation platforms like OpenTable or Resy
Repeat the claim/ownership process where needed, and make sure all logins are in your control.
Step 3: Update Core Business Info
Your NAP — Name, Address, Phone — is the foundation of restaurant listings management. Make sure it’s consistent across every platform. Swap out any old brand names, phone numbers, or email addresses the previous owner left behind.
Updating these fields may trigger a re-verification from Google. Don’t panic — just follow the same steps you already completed.
Step 4: Refresh Hours of Operation
Confirm your daily hours and add holiday hours in advance. Few things frustrate a guest more than showing up to a locked door because the online info was wrong.
Step 5: Replace Menus and Photos
If your concept or menu has changed, make sure your listings reflect the new experience. Upload your current menu, add new food and interior photos, and remove outdated content that could confuse guests.
Step 6: Monitor Reviews and Respond
You might end up with some reviews that were meant for the old business. The best move? Reply politely, mention the ownership change if it makes sense, and then focus on building your own reputation with quick, friendly responses.
Step 7: Double-Check Categories and Services
Make sure you’re listed under the right restaurant type (e.g., “Mexican Restaurant” vs. “Tex-Mex Grill”) and that services like delivery, takeout, outdoor seating, or reservations are updated.
Step 8: Simplify Restaurant Listings Management with a Tool
Managing all these platforms one by one can eat up your time — and let’s face it, you’ve got plenty of other things on your plate. That’s where Marqii comes in.
- Updates everywhere — even places you didn’t know existed. Marqii pushes your information not just to Google, Apple, and Yelp, but also to dozens of smaller publishers that still drive customer discovery and SEO.
- One source of truth. Instead of juggling logins and making updates in multiple places, you update once in Marqii and it syncs everywhere.
- Help with ownership disputes. If you run into issues claiming Google, Yelp, or Apple listings, Marqii’s support team can help with ownership disputes (with your information) so you don’t get stuck.
With Marqii, you get peace of mind knowing your restaurant listings management is handled accurately, consistently, and efficiently — so you can focus on getting your new location running smoothly.
Wrapping It Up
Taking over a restaurant location means more than just swapping out the sign and redecorating. You’re also inheriting the digital footprint, and if you don’t clean it up, you risk confusing (and losing) potential guests.
Start with Google, learn how to claim a Google Business listing, update across other key platforms, refresh your menus and photos, and stay on top of reviews. Then let Marqii handle the heavy lifting of restaurant listings management so you can focus on creating memorable dining experiences.
If you’re new here, schedule a demo to see how Marqii makes restaurant listings management simple.