How to Claim your Restaurant’s Business Page on Facebook
By the numbers, Facebook is still the number one social media platform in the world. And now that Facebook and Instagram are both part of the Meta empire, your presence on one can help you build your following on the other. And the best way to do that? Yep, you guessed it - a Facebook business page!
Why should you claim your Facebook Page?
With more than 2.9 billion active users per month, Facebook remains relevant for restaurants looking to grow. Think about it - that's a whole lot of potential just waiting to discover your food! Plus, having a Facebook page means you can easily share your menu, upcoming events, and fun promotions directly with your followers.
If you haven’t set up a Facebook business page yet, now’s the perfect time to get started. And if you already have a Facebook page that’s unclaimed or abandoned, we highly recommend taking action. Unclaimed or abandoned pages can lead to a poor guest experience for potential customers stumbling upon outdated or nonexistent information about your restaurant. That's why it's important to claim your page.
A well managed Facebook page will have all the information a customer needs to make their way through your doors. With features like action buttons, you can lead traffic straight to your website and even online ordering.
And here's the cherry on top: Facebook Business Pages aren't just about posting tasty pics. They also provide a platform for reviews. And if you have been here before, you know that reviews are a powerful tool for boosting your restaurant's visibility and attracting more foot traffic.
So, let’s dive into how to get started with Facebook Business Pages!
How to Create a Facebook Business Page with a Personal Facebook Account
Follow these steps if your restaurant doesn’t have a Facebook page at all. Before we get started, this might be obvious, but you will need a Facebook account. So if you don’t have that covered, the first step would be to create a personal account. Don’t worry, it’s super easy!
Once you have that taken care of, you’re ready to go.
Step 1: Access your Personal Facebook Account
First things first, you need to log in to your personal Facebook account as you normally would. Yup, the one with all your funny cat videos and people from high school you stalk from time to time.
Step 2: Navigate to the Menu
Once you are logged in, you will find a menu on the left side of the home page Scroll down until you find Pages. Pretty simple, right?
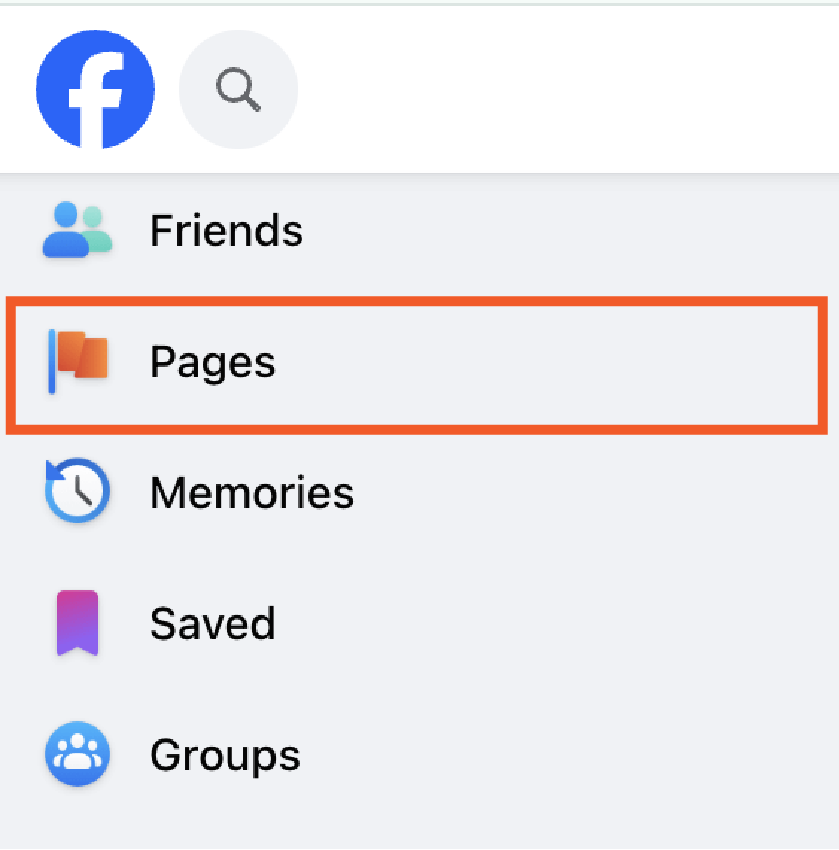
Step 3: Choose “Pages” from the Menu
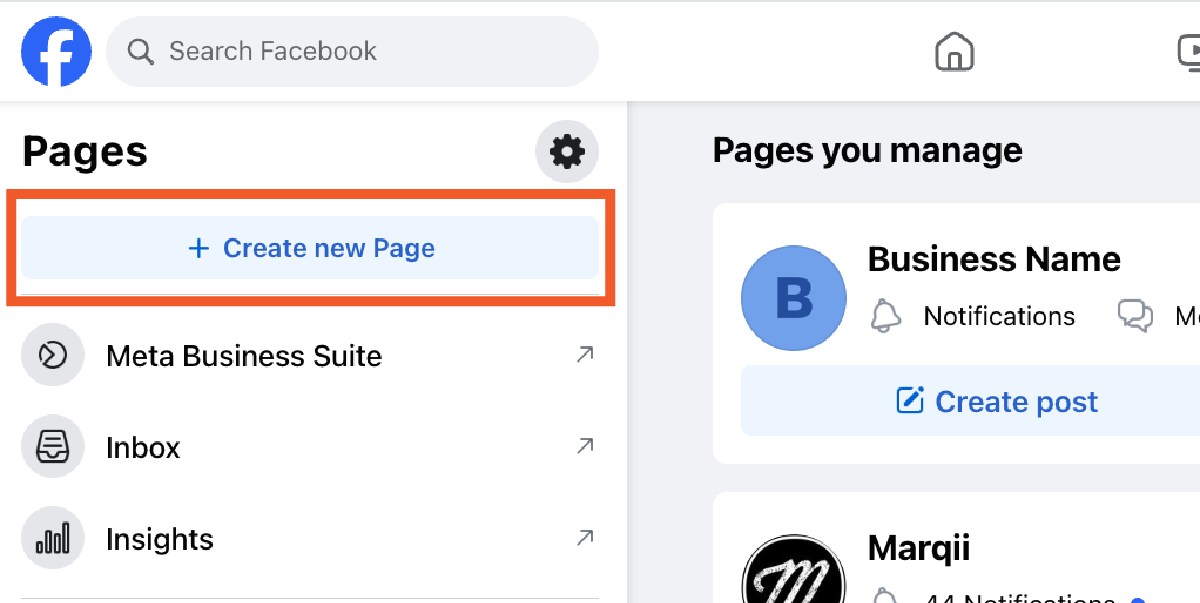
This will open up a window with any Pages you have access to. Click on Create new Page on the top left corner.
Step 4: Complete Page Setup
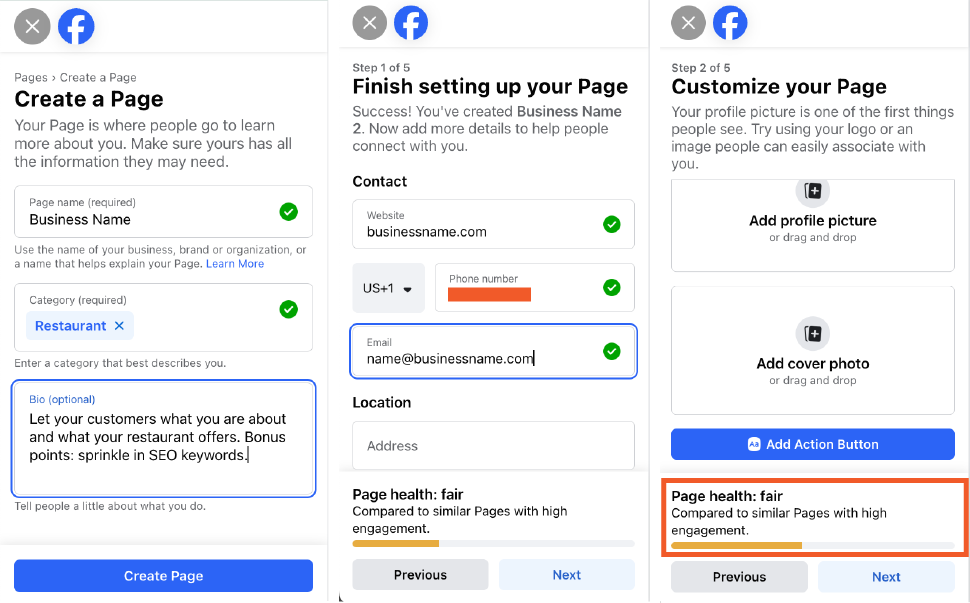
Now it's time to fill in the details about your business. Enter your business name, choose a category that best describes what you do (hint: restaurant is the answer), and add a short description to give people a glimpse of what you're all about.
Upload a profile picture that represents your business, like your logo or a beautiful photo of your most popular dish. Then, choose a cover photo that captures the essence of your brand.
Make sure you complete all the fields to increase the health score of your page. Pages with high engagement have all of the information filled out, consistent branding across all pages, and action buttons set up. Take your time completing your page… the more information, the better!
You're almost there!
Take a final look at your page to make sure everything looks good. Once you're happy with it, hit the "Done" button, and you are all set to begin engaging with your customers on Facebook!
One more tip. Don’t forget to add your hours and menu once your page is completed. This will make it easier for customers to order online directly from your Facebook page!
How to Claim an Existing Facebook Business Page With a Personal Facebook Account
An unmanaged Facebook page can be an issue, especially if customers leave feedback and you can’t communicate with them. Let’s make sure that doesn’t happen.
If your restaurant already has a Facebook Business Page, follow these simple steps to claim your page.
Step 1: Contact the Administrator
In most cases, you will know who the page admin is. To claim your page, you will need to ask them to grant you access through Facebook.
Here are the steps they would follow:
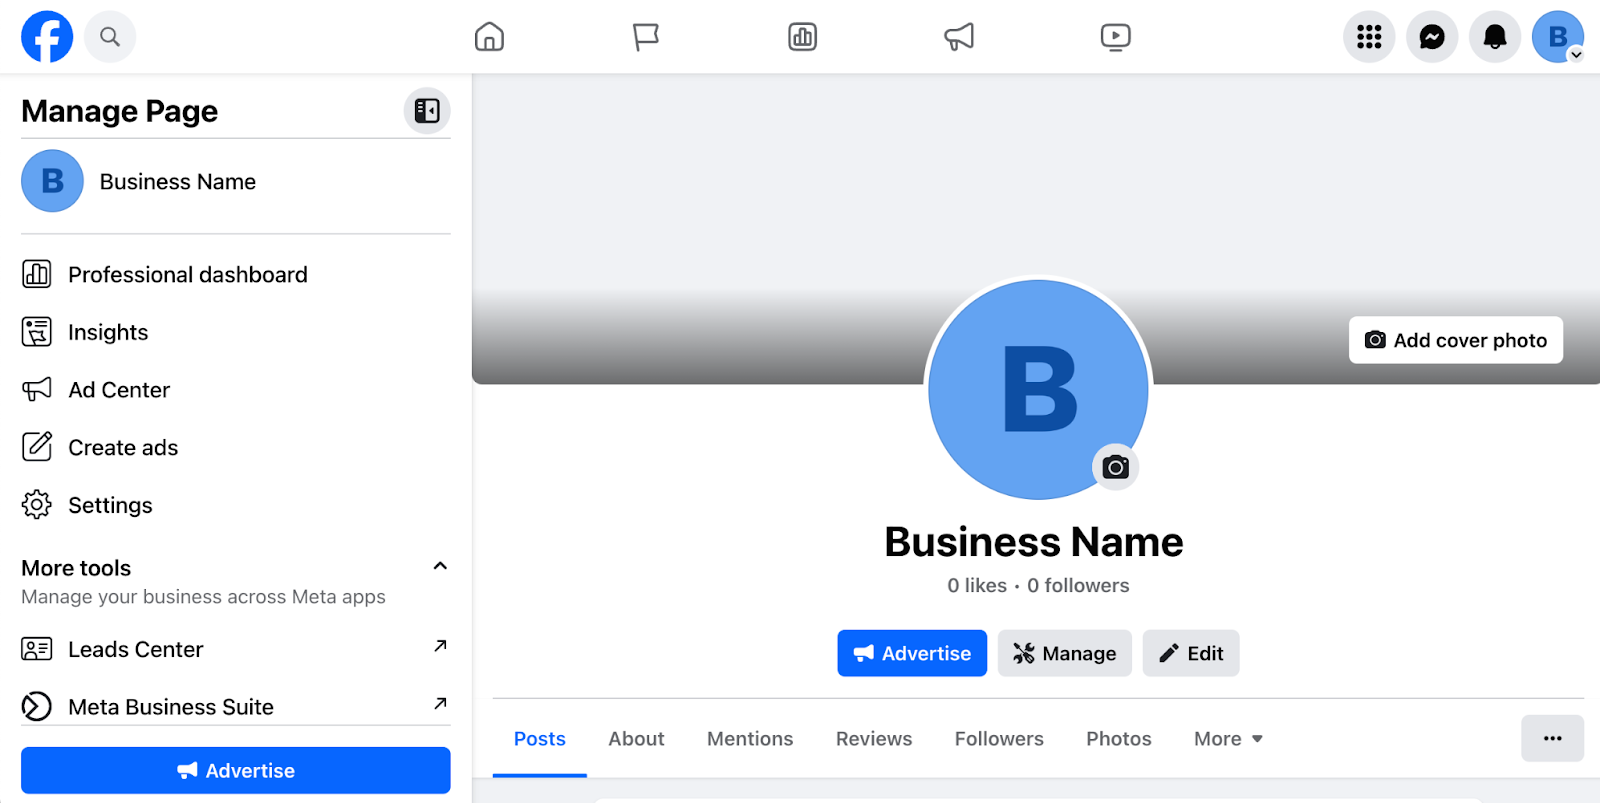
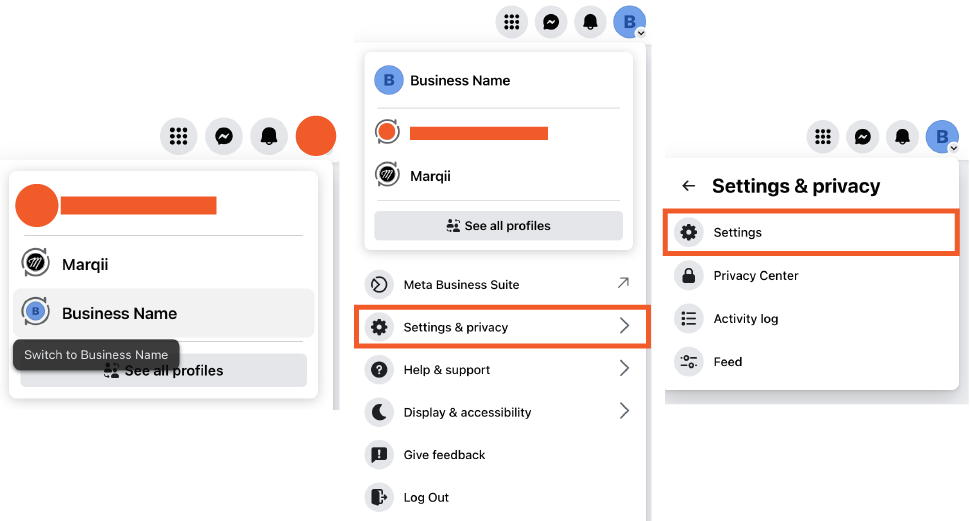
- Once the admin is logged in, they need to switch into the business page at the top right corner by clicking the profile image and selecting the page.
- Next, they will click the profile image again > select Settings & privacy > select Settings.
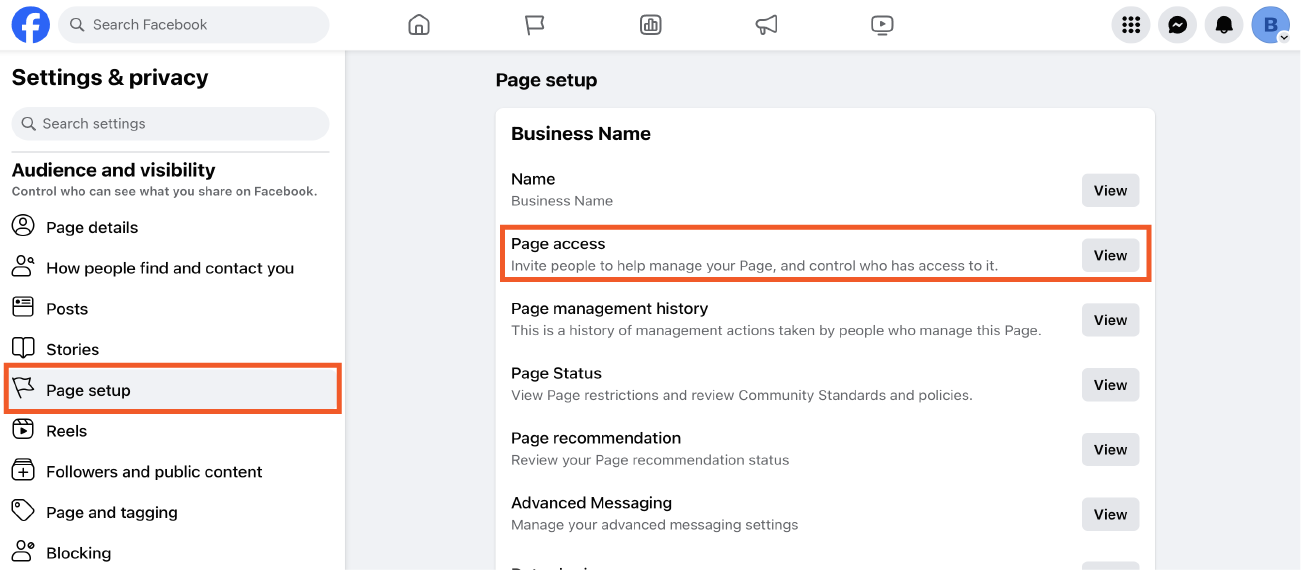
- This will bring them to the settings page and on the left hand side there will be a menu. From there they will click into Page Setup and select Page Access.
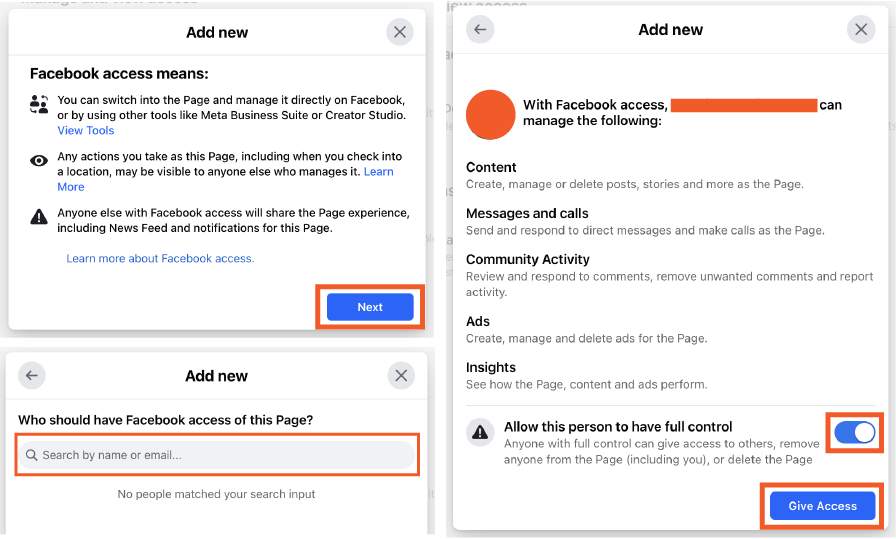
- On that page, they will click Add New and hit the Next button on the pop-up.
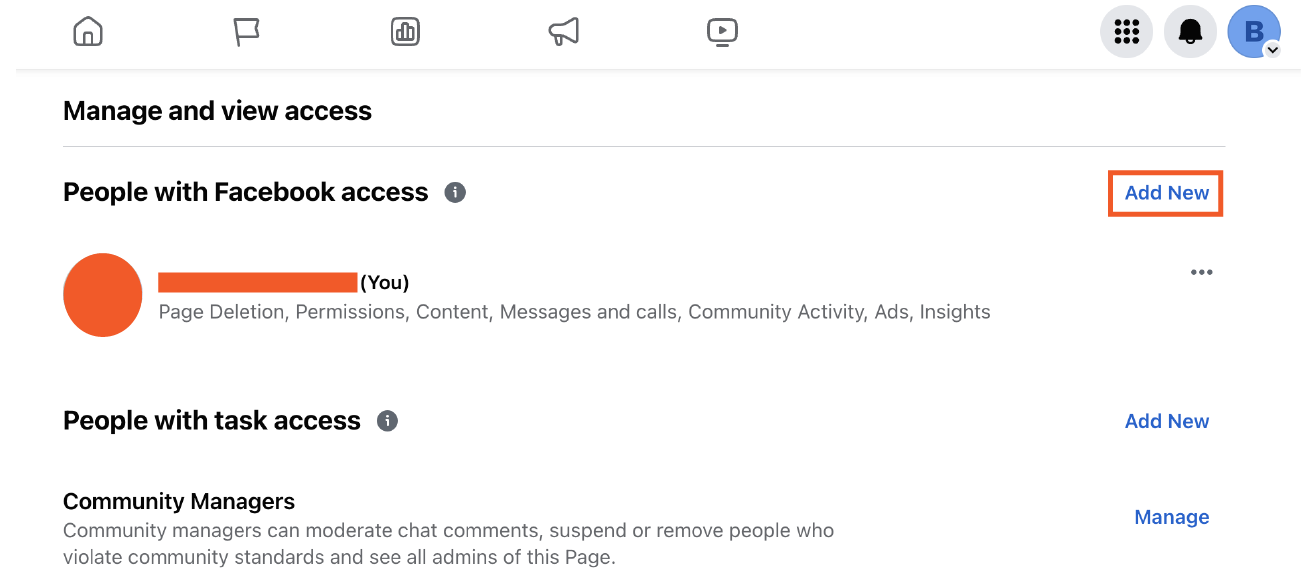
- From there, they will need to type in your name or email address associated with your personal Facebook account.
- Make sure they toggle on "Allow this person to have full control" before clicking Give Access.
- They will be asked to enter their password before clicking "Confirm"
You will then get an invitation and have 21 days to accept. Once you accept, you can go in and remove that admin (or not if they still need access) leaving you as the new owner of your business page! Boom.
How to Prove Ownership if You Can’t Contact the Admin
Claiming a Facebook Business Page without access to an admin can be a bit tricky, but it's not impossible. On the off chance that you can’t contact the admin directly, you will need to prove ownership of the business page through Facebook support.
To go through this process, Facebook will require you to verify your relationship with the business and provide official documents that clearly link you to the business in question. Here are some common examples of documents you will need:
- Business License: A copy of your official business license issued by the government or relevant authority.
- Articles of Incorporation: If your business is incorporated, providing articles of incorporation can establish your ownership.
- Tax Documents: Documents such as tax identification numbers or tax filings that show your business's legal status.
- Utility Bills or Lease Agreements: Proof of address or business location can help confirm your association with the business.
- Trademark Registration: If your business has a registered trademark, providing documentation of this registration can help verify ownership.
Managing Facebook Reviews and Listings with Marqii
All of this seeming a bit overwhelming? We can help.
At Marqii, we totally get how important it is for local businesses to shine online. That's why we've created a platform design to help our customers boost their online presence. Whether it’s managing listings on Facebook or responding to reviews on Google, we got you covered.
We also have an amazing support team who help Marqii customers claim and improve their Facebook pages and listings.
Ready to take control of your online reputation? Schedule a demo now!